Open Files in Vim from Finder
Using your favourite editor in a terminal right from the MacOS Finder is a major speed improvement
If you’re anything like me, you do a lot of editing on the Terminal. However, sometimes I’m browsing
a project or some downloaded artifact from Finder. When double-clicking a .md file then proceeds to
open XCode, I have this immediate sensation of “Oh no, what have I done!?”. Well, I fixed that.

But why Vim!?
Vim is my editor of choice for basically everything. Or at least for quickly viewing a file and making some small changes. It’s a great tool where I have no need to leave my keyboard and to be honest, it just feels a bit cozy to be working in the Terminal.
But if Vim is your worst nightmare and you would rather use Emacs, or Nano or even just the more command,
you can easily change that in the solution that’s coming up.
Using Apple Automator
MacOS comes with this great tool “Automator”. It allows you to create all sorts of script, applications and plugins for various parts of the MacOS operating system. The fact that it allows us to create a script that is bundled in such a way that MacOS sees it as a full-fledged app is what we will be using here.
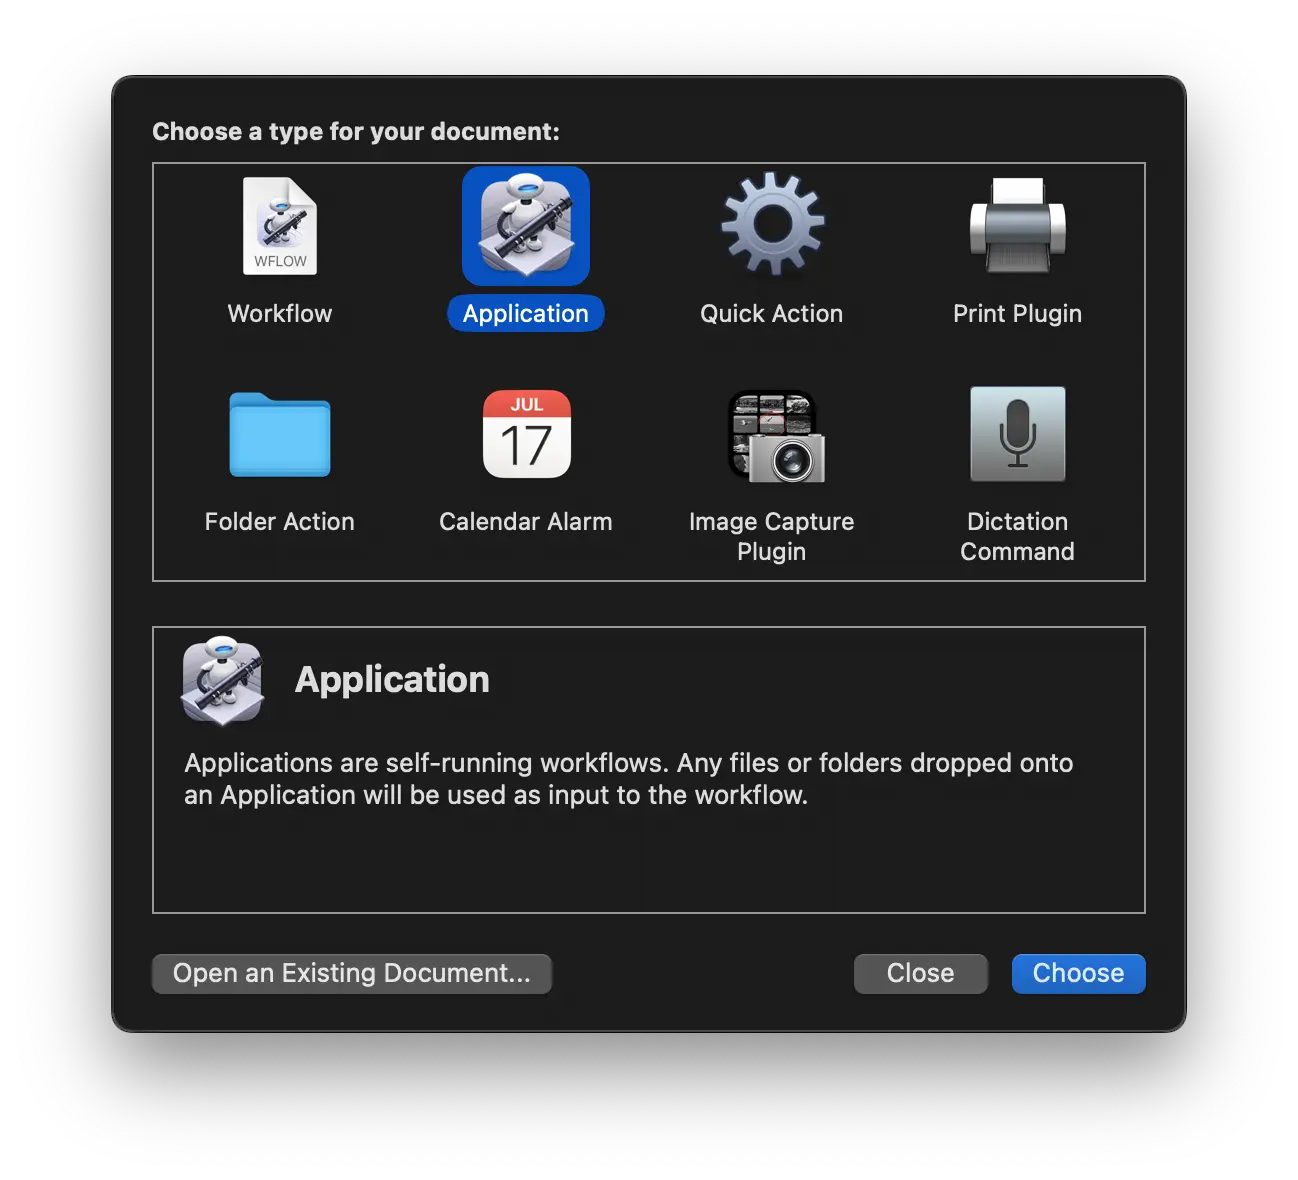
Open Automator and select “New Document” and then select “Application”.
When this newly built application is started, we want it to do one thing: open whatever file was passed to it in Vim in the Terminal. AppleScript is perfect for this, since we can boil our wishes down to a small set of actions:
- Open or Activate the iTerm (or Terminal) app
- Create a new tab or session
- Change to the folder where the file is
- Open the file with Vim
In automator, we look for the “Run AppleScript” action in the “Utilities” section of the Library. When you find it, drag it to the large empty part of the window. You now have a segment that contains a small dummy AppleScript which you can edit.
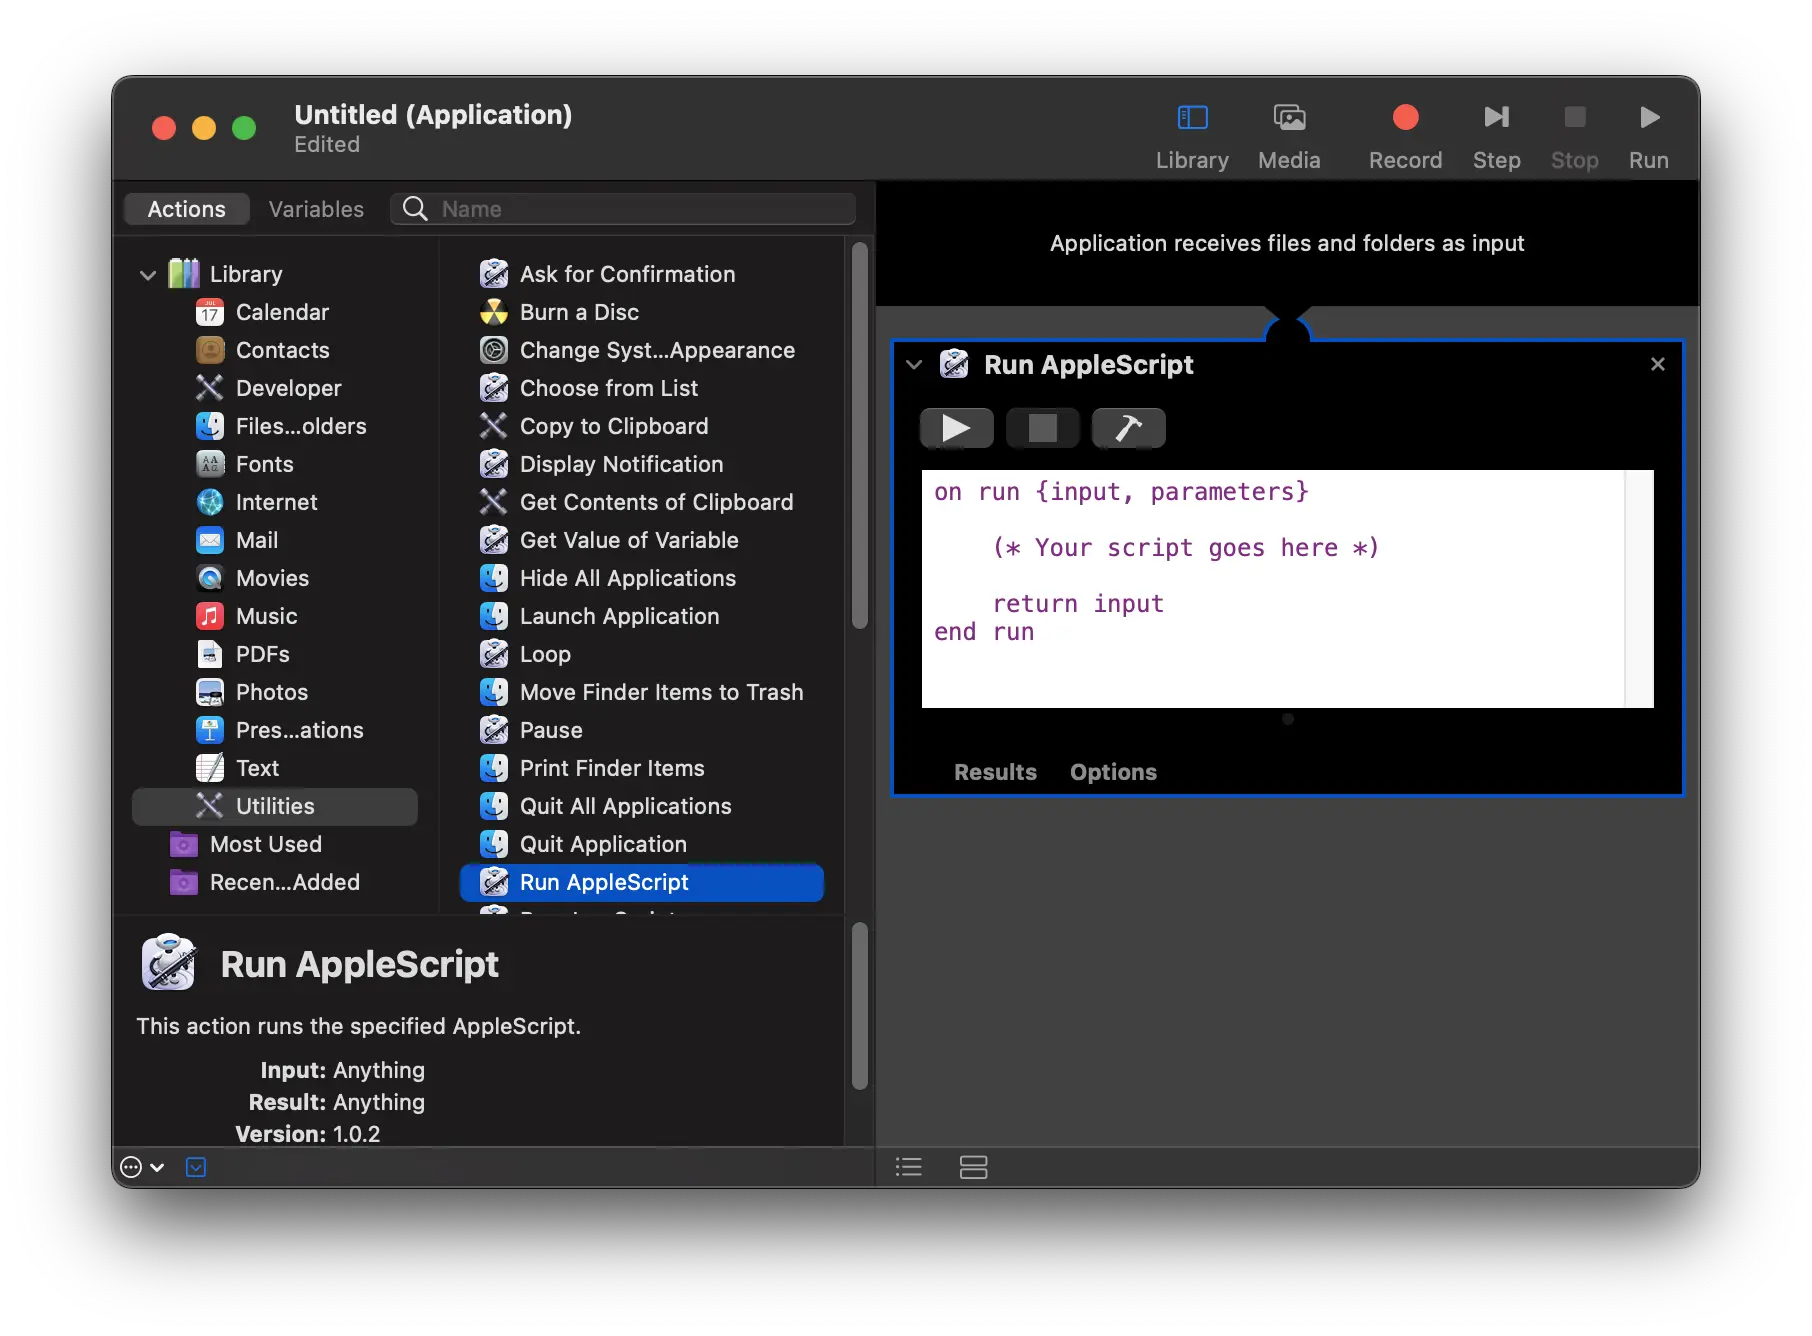
The small set of actions we noted above translate to quite a piece of AppleScript. The code contains comments to
explain what each piece does. This is also the code where you can choose to use a different editor by changing
the generated commands. If you simply replace vim with emacs, it will open Emacs, etc. Copy and paste this piece
of code in the Run AppleScript block in your Automator document.1
Not using iTerm? Check the footnote.
-- This is the entrypoint of the script. The input argument
-- contains the file that you tried to open with this application.
on run {input}
  if length of input is equal to 1 then
    my openFile(input)
  else
    -- If no input was provided, this script will simply open a
    -- terminal with Vim
    my justOpen()
  end if
end run

-- This function gets the path of the file from the MacOS system
-- and creates the commands to execute in the shell to open the
-- file in Vim
on openFile(input)
  set the_file to quoted form of POSIX path of input
  tell application "System Events"
    set the_path to POSIX path of (container of (item 1 of input))
  end tell

  set cwd to "cd " & the_path
  set cmd to "vim " & the_file
  my launchVim(cwd, cmd)
end openFile

-- This function is called when no arguments were provided and we
-- should just open Vim
on justOpen()
  set cwd to "cd"
  set cmd to "vim"
  my launchVim(cwd, cmd)
end justOpen

-- This function actually talks to iTerm and makes it change the
-- current working directory to the location of the file and then
-- opens Vim  with the file in the editor.
on launchVim(cwd, cmd)
  tell application "iTerm"
    activate
    tell the current window
      create tab with default profile
      tell the current session
        write text cwd
        write text cmd
      end tell
    end tell
  end tell
end launchVim
Note: if you are not using iTerm, but the Terminal app from MacOS, change the contents of launchVim to this:
tell application "System Events" to set terminalIsRunning to exists application process "Terminal"

tell application "Terminal"
  activate
  if terminalIsRunning is true then
    tell application "System Events" to tell process "Terminal" to keystroke "t" using command down
    do script with command cwd in selected tab of the front window
    do script with command cmd in selected tab of the front window
  else
    do script with command cwd in window 1
    do script with command cmd in window 1
  end if
end tell
Now select “Save…” from the “File” menu and make sure the location for saving is set to the “Applications” folder. Type a name for it (something like “Vim Launcher”) and save it.
Congratulations, you just created a full-fledged MacOS Application! It is now time for the final step: making Finder
open your favourite file types with this new launcher. Go to Finder and locate a file you want to open. Perhaps a Markdown
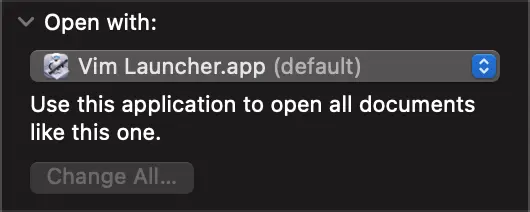
or JSON or just a plain .txt file. Right click on the file and select “Get Info”.
On the “Open With” panel, you should now be able to select your new “Vim Launcher”, or however you named it. Set it to this application and click “Change all” to apply it to all files with this type in the future.
And now you get to experience the wonders of opening Vim from Finder. Double click your selected file and watch a terminal pop up with your favourite editor in it!